
x ray positioning chart with images pdf
An X-ray positioning chart is a visual guide detailing patient positioning and X-ray beam orientation for clear imaging. It ensures accurate diagnoses and is essential for radiographers and technicians to standardize procedures and achieve consistent image quality.
1.1 Definition and Purpose
An X-ray positioning chart is a detailed visual guide that outlines the correct placement of the patient and the orientation of the X-ray beam. Its primary purpose is to ensure accurate and reproducible imaging results by standardizing radiographic techniques. These charts are essential for radiographers and technicians, providing clear instructions for positioning patients to capture high-quality images. They contribute to consistent image quality, reducing errors and enhancing diagnostic reliability. The charts are widely used in medical facilities to streamline radiographic procedures and improve patient care outcomes.
1.2 Importance in Radiography
X-ray positioning charts are crucial for ensuring consistency and accuracy in radiographic imaging. They help standardize techniques, reducing errors and the need for retakes, which enhances diagnostic reliability. By providing clear guidelines, these charts improve image quality, making it easier for radiologists to interpret results. They also play a key role in radiography education, serving as a foundational tool for training. Overall, positioning charts contribute to efficient workflows, improved patient safety, and better clinical outcomes in diagnostic imaging.
Anatomy and Radiographic Positioning
An understanding of anatomy is fundamental to radiographic positioning, as it ensures proper alignment of body structures with the X-ray beam, optimizing image clarity and diagnostic accuracy.
2.1 Basic Anatomical Landmarks
Basic anatomical landmarks are essential for accurate radiographic positioning, as they serve as reference points for aligning the X-ray beam and patient. These landmarks, such as the midsagittal plane, vertebral bodies, and joint spaces, guide technicians in standardizing patient positioning. Understanding these structures ensures proper beam orientation, minimizing distortions and ensuring diagnostic-quality images. For instance, the right middle lobe touching the right heart border and the lingular segment of the left upper lobe near the left heart border are critical landmarks in chest imaging. These references help in achieving precise and reproducible results.
2.2 Patient Positioning Techniques
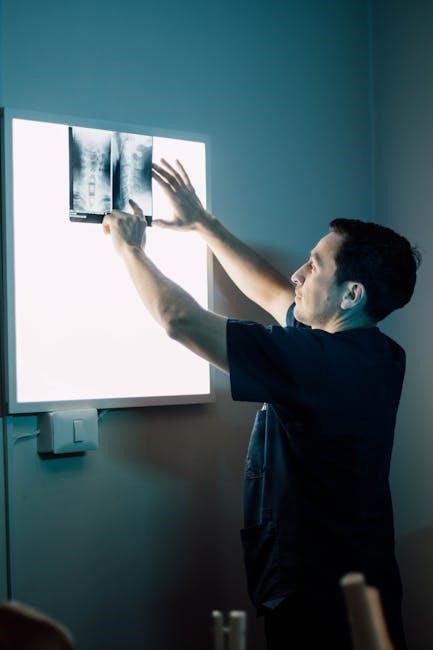
Patient positioning techniques are critical for obtaining accurate and diagnostic-quality X-ray images. These techniques involve aligning the patient’s body in specific ways to ensure proper X-ray beam orientation and penetration. Proper positioning minimizes distortions and ensures that anatomical structures are clearly visible. Techniques include supine, prone, upright, and lateral positions, depending on the body region being imaged. For example, chest X-rays often use the posteroanterior (PA) view, where the patient stands upright and the X-ray beam travels from back to front. Accurate positioning is essential for capturing high-definition images and diagnosing conditions effectively. It also reduces the need for retakes, improving patient safety and workflow efficiency.
Common X-Ray Views and Projections
Common X-ray views include standard projections like posteroanterior (PA) chest, lateral spine, and anteroposterior (AP) abdominal views. These ensure clear imaging of anatomical structures for accurate diagnoses.
3.1 Standard Views for Different Body Regions
Standard X-ray views are tailored to specific body regions to ensure optimal imaging. For the chest, posteroanterior (PA) and lateral views are common. Skull imaging includes lateral and frontal projections. Spine X-rays often use anteroposterior (AP) and lateral views. Extremities typically employ AP and lateral views to assess fractures or joint alignment. These standardized approaches ensure reproducibility and clarity, aiding in accurate radiographic interpretation and diagnosis.
3.2 Specialized Projections for Detailed Imaging
Specialized X-ray projections provide detailed imaging for complex anatomical structures. Oblique views capture areas like the facet joints in the spine. Stress views assess joint stability, particularly in the wrists or ankles. Magnification views enlarge small structures, such as dental or bone fragments. These advanced techniques require precise patient positioning and often involve additional equipment or angles. They are invaluable for diagnosing conditions that standard views cannot adequately visualize, ensuring accurate and comprehensive radiographic assessments across various body regions.
Skull and Head Imaging
Skull and head imaging involves precise X-ray positioning to visualize cranial structures, sinuses, and facial bones. Key projections include lateral, frontal, and occipitomental views for detailed diagnostics.
4.1 Lateral Skull Projection
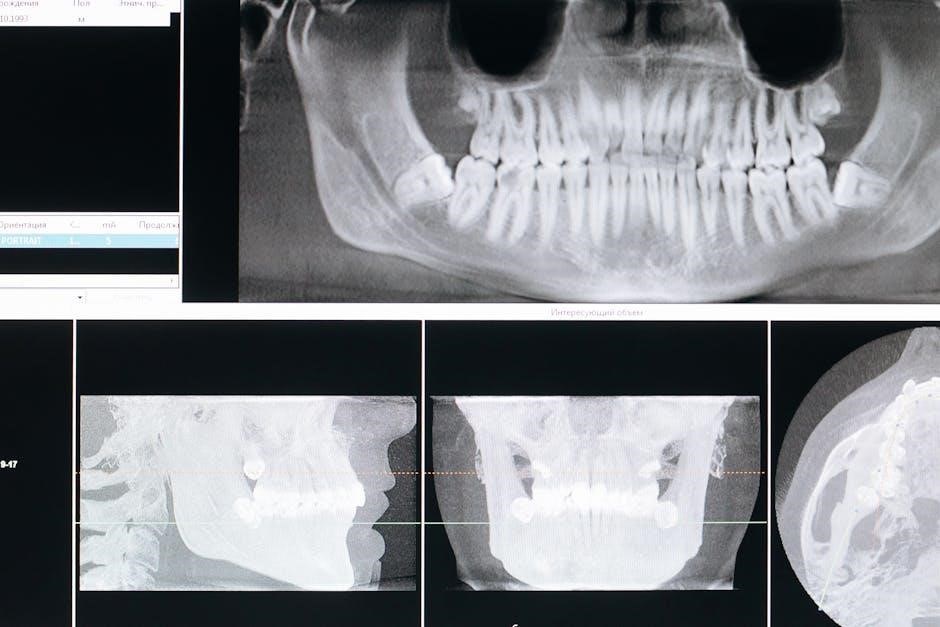
The lateral skull projection is a fundamental view in skull imaging, providing a clear profile of cranial structures. The patient stands or sits with their head positioned sideways, ensuring the petrous ridge is visible; The X-ray beam is angled to pass through the occipital bone and exit above the opposite eye. Proper alignment ensures clarity of the sinus cavities, occipital bone, and posterior cranial fossa. This projection is essential for diagnosing fractures, sinusitis, and abnormalities in posterior skull structures.
4.2 Frontal Skull Projection
The frontal skull projection captures a detailed anterior-to-posterior view of the skull. The patient faces the X-ray machine with their head in a neutral position, ensuring the Frankfurt plane is horizontal. The X-ray beam is centered on the midsagittal line and perpendicular to the image receptor. This projection is ideal for assessing frontal sinuses, orbits, and ethmoid air cells. It aids in diagnosing fractures, sinusitis, or abnormalities in anterior cranial structures, ensuring accurate imaging for diagnostic purposes.
4.4 Occipitomental View
The occipitomental view is a specialized skull projection that provides a lateral perspective of the facial bones. The patient rotates their head 30 degrees from the midline, aligning the occipital bone and mental process. The X-ray beam is angled at 15 degrees caudally to capture the maxilla, zygoma, and mandible. This view reduces superimposition of cranial structures, aiding in diagnosing fractures or abnormalities in the facial bones. It is particularly useful for patients unable to position for standard lateral projections due to trauma or mobility issues.

Chest and Thoracic Imaging
Chest and thoracic imaging involves standard radiographic projections to assess the lungs, heart, and associated structures. Common views include PA, AP, and lateral chest X-rays, providing detailed imaging of internal structures for diagnostic purposes.
5.1 Posteroanterior (PA) Chest View
The posteroanterior (PA) chest view is a standard radiographic projection for thoracic imaging. The patient stands upright, with hands on hips, and the X-ray beam is directed from the posterior to the anterior surface. This view provides a clear representation of the heart, lungs, and mediastinum, making it essential for diagnosing chest conditions. Proper patient positioning ensures accurate imaging, with the clavicles below the lung fields and the diaphragm visible at the lower lung borders.
5.2 Lateral Chest View
The lateral chest view is an essential radiographic projection for evaluating the thoracic cavity. The patient stands or sits upright, positioned sideways to the X-ray table, with hands resting on their thighs. The X-ray beam is directed horizontally from posterior to anterior. This view helps assess the chest’s anterior and posterior structures, such as the spine, mediastinum, and diaphragm. Proper alignment ensures the clavicles are projected above the lung fields, providing a clear image for diagnosing conditions like pleural effusion or pulmonary lesions. It complements the PA view for comprehensive chest evaluation.
5.3 Oblique Chest Views
Oblique chest views are specialized radiographic projections that provide detailed imaging of specific thoracic structures. The patient is positioned at a 45-degree angle to the X-ray table, either right or left posterior oblique. The X-ray beam is angled to accommodate the body’s orientation. This view is particularly useful for evaluating posterior lung fields, ribs, and mediastinal structures. It helps identify lesions or fractures not visible in standard PA or lateral views. Positioning charts in PDF format often include illustrations of oblique chest views to guide accurate patient alignment and technique.

Extremities Imaging
Extremities imaging focuses on X-ray positioning for upper and lower limbs, ensuring accurate depiction of bones, joints, and soft tissues. Standard views include AP, lateral, and oblique projections. Proper patient positioning enhances diagnostic clarity. Positioning charts in PDF format often include detailed illustrations for precise alignment and technique, aiding in optimal image acquisition for both clinical and educational purposes.
6.1 Upper Limb Positioning
Upper limb positioning involves precise alignment of the shoulders, elbows, forearms, wrists, and hands for accurate X-ray imaging. Standard projections include anteroposterior (AP) and lateral views. For shoulders, the scapular Y-view is commonly used, while elbow imaging requires flexion or extension. Wrist and hand positioning often involves neutral or angled placements. PDF charts provide detailed illustrations, ensuring proper alignment and minimizing retakes. These guides are invaluable for radiography students and professionals, enhancing technique consistency and diagnostic accuracy.
6.2 Lower Limb Positioning
Lower limb positioning focuses on the hips, knees, ankles, and feet. The anteroposterior (AP) and lateral views are standard for hip and knee imaging. For ankles, weight-bearing views are often used to assess joint alignment. Foot positioning may involve dorsal-plantar or lateral projections. PDF charts provide visual guides for accurate alignment, ensuring proper X-ray results. These resources are essential for radiography professionals to maintain consistency and precision in lower limb imaging, reducing errors and improving diagnostic outcomes.
6.3 Joint Imaging Techniques
Joint imaging techniques require precise positioning to evaluate joint alignment and integrity. AP and lateral views are standard, while oblique projections may be used for complex joints. Weight-bearing views are essential for assessing joint spaces and degenerative changes. Flexion and extension views help evaluate joint mobility. PDF charts provide detailed guides for positioning, ensuring accurate and reproducible results. These techniques are critical for diagnosing fractures, dislocations, and degenerative conditions, aiding radiographers in capturing high-quality images for effective patient care.
Spine Imaging
Spine imaging involves AP, lateral, and oblique views to assess alignment and curvature. X-ray positioning charts guide accurate imaging of cervical, thoracic, and lumbar regions for diagnostic clarity.
7.1 Cervical Spine Positioning
Cervical spine positioning requires precise alignment to capture clear images of the vertebrae and surrounding structures. The patient is typically positioned upright or recumbent, with the head in a neutral position. The X-ray beam is angled to ensure optimal visualization of the cervical vertebrae, from C1 to C7. Proper positioning ensures accurate assessment of fractures, degenerative changes, or misalignments. Digital charts provide detailed guidance, including beam angles and patient adjustments, to achieve consistent and diagnostic-quality images for radiographic evaluation.
7.2 Thoracic Spine Positioning
Thoracic spine positioning involves precise patient alignment to capture the T1 to T12 vertebrae. Patients are typically positioned in a posterior-anterior (PA) projection, standing upright or recumbent. The X-ray beam is centered at the midthoracic level, with adjustments made to accommodate the natural curvature of the spine. Lateral views are also common for assessing vertebral alignment. Proper positioning ensures clear visualization of the thoracic spine, aiding in the diagnosis of fractures, degenerative conditions, or spinal deformities. Digital charts provide detailed imaging parameters for accurate results.
7.3 Lumbar Spine Positioning
Lumbar spine positioning involves aligning the patient to accurately capture the L1 to L5 vertebrae. Patients are typically positioned in a supine or erect posterior-anterior (PA) projection. The X-ray beam is centered at the L3 vertebra, ensuring the lumbar lordosis is minimized. Lateral views are also used to assess intervertebral spaces and vertebral alignment. Proper positioning is critical for diagnosing conditions like disc degeneration, fractures, or spondylolisthesis. Digital charts provide precise imaging parameters to optimize diagnostic accuracy in lumbar spine radiography.

Digital X-Ray Positioning Charts
Digital X-ray positioning charts offer precise, reproducible guidelines for radiographers, enhancing accuracy and consistency in imaging. They provide standardized protocols for various anatomical regions, ensuring optimal image quality and diagnostic reliability in modern radiography.
8.1 Benefits of Digital Formats
Digital X-ray positioning charts in PDF format offer numerous advantages, including easy accessibility, sharability, and the ability to store multiple charts in a single file. They reduce physical storage needs, are environmentally friendly, and can be quickly updated. Digital formats also enable search functionality, making it easier to locate specific views or projections. Additionally, they can be integrated with digital imaging systems, enhancing workflow efficiency in radiography departments. This modern approach ensures consistency and accuracy in radiographic positioning.
8.2 PDF as a Standard Format for Sharing
PDF (Portable Document Format) is widely recognized as a standard for sharing X-ray positioning charts due to its universal compatibility and ability to maintain formatting across devices. It supports high-resolution images, making it ideal for detailed radiographic illustrations. PDFs are also easily shareable via email or cloud storage, facilitating collaboration among healthcare professionals. Additionally, PDFs can be password-protected, ensuring patient data security. Their versatility and reliability make them a preferred choice for distributing X-ray positioning charts in medical settings.

Creating an X-Ray Positioning Chart
Creating an X-ray positioning chart involves organizing anatomical references, imaging techniques, and patient positioning guidelines. It requires clarity and precision to ensure accurate radiographic outcomes.
9.1 Steps to Develop a Comprehensive Chart
Developing a comprehensive X-ray positioning chart involves several structured steps. First, research standard anatomical references and imaging protocols. Next, organize the information by body regions and common views. Include high-quality images for clarity. Label anatomical landmarks and positioning details precisely. Ensure the chart is visually appealing with proper formatting. Finally, review and validate the content with radiography experts to ensure accuracy and practicality. Regular updates are essential to reflect advancements in radiographic techniques and technologies.
9.2 Tools and Software for Design
Creating an X-ray positioning chart requires specialized tools. Adobe Illustrator and Photoshop are ideal for designing vector graphics and editing images. RadiAnt DICOM Viewer helps visualize medical images. Canva is useful for layout design and non-technical users. Lucidchart and SmartDraw assist in creating flowcharts and diagrams. Graphic, a vector graphics editor, simplifies detailed illustrations. PDF creation tools like Adobe Acrobat ensure professional formatting. These tools collectively enable the production of a clear, visually appealing, and informative chart for radiography practices.
Practical Applications
X-ray positioning charts are essential for education, training radiographers, and ensuring accurate diagnostic imaging. They guide clinical workflows, improving consistency and patient safety during exams.
10.1 Use in Radiography Education
X-ray positioning charts are invaluable in radiography education, serving as visual guides for students to master proper patient alignment and technique. Including images in PDF formats enhances understanding, allowing learners to visualize anatomical landmarks and optimal beam angles. These charts standardize teaching methods, ensuring consistency in training. They also help students develop critical thinking skills, enabling them to adapt positioning strategies for diverse patient needs. This educational tool bridges theory and practice, fostering competence in producing high-quality diagnostic images.
10.2 Clinical Application in Diagnostic Imaging
In clinical settings, X-ray positioning charts with images serve as essential references for radiographers to ensure accurate and reproducible imaging. These charts guide proper patient positioning, reducing errors and radiation exposure. They aid in producing consistent image quality, which is critical for accurate diagnoses. Clinicians rely on these tools to standardize protocols, enhance efficiency, and maintain patient safety. PDF formats are particularly useful for quick access and sharing among healthcare teams, facilitating seamless communication and decision-making in diagnostic imaging workflows.

Recent Advancements
Advancements in AI and 3D imaging have revolutionized X-ray positioning, enhancing accuracy and detail in diagnostic imaging.
11.1 AI in X-Ray Positioning
Artificial intelligence (AI) is transforming radiography by enhancing X-ray positioning accuracy. AI algorithms analyze patient anatomy and positioning charts to optimize image quality. They detect misalignments and suggest corrections, reducing retakes. AI also improves dose optimization, ensuring minimal radiation exposure. Automated tools assist technicians in achieving precise alignments, especially for complex views. AI-powered systems can even predict optimal angles and positions, streamlining workflows. This technology integrates seamlessly with digital positioning charts, enabling faster and more accurate diagnostic imaging.
11.2 3D Imaging and Its Impact
3D imaging revolutionizes X-ray positioning by providing detailed spatial information. It enhances diagnostic accuracy by visualizing complex anatomical structures. 3D reconstructions reduce the need for multiple views, lowering radiation exposure. This technology aids in precise positioning for fractures, tumors, and joint evaluations. Integration with digital charts enables better pre-operative planning and education. 3D imaging also improves patient outcomes by allowing radiographers to refine techniques and minimize errors, ensuring high-quality diagnostic results consistently.
Case Studies
Real-world applications of X-ray positioning charts in medical facilities, highlighting successful implementations and challenges faced during diagnostic imaging procedures. These studies provide insights into optimizing patient care.
12.1 Successful Implementation in Medical Facilities
Medical facilities have effectively integrated X-ray positioning charts with images in PDF format, enhancing radiographic accuracy. These charts provide clear anatomical references, ensuring consistent and precise patient positioning. By standardizing procedures, facilities have reduced retakes and improved diagnostic quality. The visual guides are particularly useful for training radiography students and new staff. Successful implementation has also streamlined workflows, saving time and improving patient care outcomes. The use of PDFs ensures easy accessibility and compatibility across various devices, making them indispensable in modern radiography practices.
12.2 Challenges and Solutions
Implementing X-ray positioning charts with images in PDF format presents challenges, such as standardizing procedures across departments and ensuring staff proficiency. Solutions include developing comprehensive guidelines and providing mandatory training programs. Regular audits help maintain consistency and accuracy. Additionally, collaborating with radiography experts ensures charts are updated with current techniques. Optimizing PDFs for all devices addresses compatibility issues, facilitating seamless integration into clinical workflows and enhancing overall efficiency in medical imaging.
X-ray positioning charts with images in PDF format are essential tools for precise radiography, ensuring accuracy and consistency in medical imaging. Their standardized approach enhances diagnostic confidence.
13.1 Summary of Key Points
X-ray positioning charts with images in PDF format are essential tools for radiography, combining precise anatomical guidelines with visual aids for accurate imaging. They standardize procedures, reduce errors, and enhance diagnostic accuracy. These charts are versatile, catering to various body regions and specialized views, ensuring consistency across medical facilities. Their digital accessibility in PDF format allows easy sharing and reference, making them indispensable for both clinical practice and educational training in radiography.
13.2 Future Trends in X-Ray Positioning
Future trends in X-ray positioning emphasize integration with AI for automated adjustments and predictive analytics. 3D imaging and augmented reality will enhance precision and training. Cloud-based positioning charts in PDF formats will improve accessibility and collaboration. Advances in digital tools will reduce radiation exposure and streamline workflows. These innovations aim to enhance diagnostic accuracy, patient safety, and operational efficiency, shaping the future of radiography with cutting-edge technology and user-friendly resources.

village baker nutrition pdf

You May Also Like

m.i.n.i. neuropsychiatric interview pdf

overhead door legacy 850 manual